
CHAPTER 4
LOAD-CARRYING EQUIPMENT
Care and Use of Individual Clothing and Equipment, January 1966
- General. Individual load-carrying equipment
consists of the items illustrated in figure 14. Each
item has been designed to make the job of carrying
the equipment a soldier needs easier and more comfortable. There are certain
rules, however, that must be followed if the equipment is to do the job
for which it is intended. If the rules listed in (1)
through (4) below are followed, individual loads can
be carried with more ease and comfort. To forget or
overlook them makes a difficult job just that much
harder.
- Keep load as light as possible.
- Know your equipment.
- Assemble the equipment correctly.
- Keep every item in its proper place.
Note. The equipment to be described is intended
for use in hot, temperate, and cold-wet regions of
the world. It is not for use in cold-dry arctic
regions.
 Components.
- Pistol belt.
- Description. The olive drab cotton webbing pistol belt (1), which is the M-1956 model, has a special ball-type fastener which increases the ease with which the belt can be put on and taken off. It utilizes eyelets for attachment purposes, and has four sliding keepers which are used to prevent the belt hooks from becoming unfastened after adjustment to the wearer's waist.
- Principle of use. The pistol belt helps to support the field pack and is used to carry the intrenching tool and carrier, ammunition pouches, canteen and canteen cover, and first aid or compass case.
- Fitting. The pistol belt is issued in two sizes, medium and large, so that it can be adjusted to fit over all layers of outer clothing, including the complete cold-wet ensemble and the armored vest. If user's bare waist measures under 30 inches, he should wear the medium belt. If user's bare waist measures 30 inches or more, he should wear the large belt.
- Suspenders.
- Description. The olive drab cotton webbing suspenders (2), with the pistol belt, make up the two basic individual load carrying equipment items because the remaining components are suspended from or attached to these items. The suspenders are of olive drab cotton webbing and drill cloth, and they may be adjusted by means of clamp-type buckles.
- Principle of use. The suspenders are used to support, the field pack and the pistol belt. The shoulder pads should be centered on the shoulders in order to distribute the weight of the load evenly. The suspenders may be worn without the field pack. When wearing the suspenders without the field pack, the suspender straps should be attached directly to the pistol belt. To keep the weight of the load evenly on both shoulders, attach the rear suspender straps at even spaces from the center of the rear of the pistol belt.
- Fitting. Suspenders are issued in three sizes—regular, long, and extra, long. If user is under 68 inches tall without shoes, he should wear the regular size. If user is 68 inches or over without shoes, he should wear the large size. If user is tall or broad-chested, and anticipates wearing the load-carrying equipment over cold-wet outer garments and/or armored vest, he should wear the extra long size. When possible, fitting should be determined, by the try-on method.
- Field pack.
- Description: The cotton duck field pack (3) is 9 inches wide, 8 3/4 inches high, and 5 inches deep. It has a waterproof throat at the top of the pack and an expandable flap which is secured by two web straps and buckles. There are two web straps on the bottom of the pack to permit attachment of other items. A handle is located on the flap so that the pack can be carried by hand. The back of the pack has two attaching clips and eyelets so that the pack can be attached to the suspenders and to the pistol belt. A plastic card holder is located at the top of the pack for identification purposes.
- Principle of use.
- The field pack is used to carry individual rations and equipment that are essential during field operations. It is designed to permit certain items to be carried in a. number of different ways to meet changing conditions. For example, the poncho, can be carried inside the pack under the expandable flap or it can be attached to the bottom of the pack by means of the two adjustable securing straps.
- Extra items of small clothing, such as underwear and socks, also can be rolled and placed under the expandable flap.
- Outer clothing not in use can be secured under the pack or under the flap, depending on the location of the poncho.
- In placing items in the field pack, hard objects such as ration cans should be placed on the outside, with softer items such as clothing on the inside toward the wearer's back.
- A series of eyelets at the edge of the pack flap will accommodate the double hooks used on old field equipment carriers for such items as wire cutters and machetes.
- Intrenching tool carrier. The intrenching tool carrier (4) is made of olive drab cotton duck material and is attached to the pistol belt by means of two attaching clips located on the back. An attachment for carrying the bayonet or bayonet knife scabbard is located on the front of the carrier.
- Ammunition pouches.
- Description. Each small arms ammunition pouch (5) is 4 1/4 inches wide, 6 1/4 inches high and 2 1/2 inches deep. Plastic stiffeners are provided in the back of the pouch so that clips of ammunition can be easily inserted and removed. There are two attaching clips and supporting straps on the back of each pouch so that the pouches can be attached to the pistol belt and to the suspenders. Both sides of each pouch have attachments for carrying hand grenades.
- Principle of use. Each ammunition pouch is designed to carry any of the basic loads of ammunition. But with special weapons, it may be necessary to carry more ammunition than the pouches will accommodate. When extra ammunition is necessary, bandoleers of ammunition may be carried in a cross-chest manner. To place bandoleers of ammunition in the ammunition pouches, make a neat bundle by folding the bandoleers accordion-fashion and placing them in the pouches with the bandoleer straps at the top. This method permits the bandoleers to be inserted and removed easily.
- Canteen cover.
- Description. The cotton duck canteen cover (6) has either a pile or a felt lining and is attached to the pistol belt by means of two attaching clips which are located on the back of the cover.
- Principle of use. The canteen cover accommodates the canteen. The lining on the inside of the canteen cover should be kept wet during hot weather in order to help keep the water in the canteen cool. The cover should be kept dry during cold weather, however, as the lining material provides limited protection in preventing the water in the canteen from freezing.
- First aid case.
- Description. The cotton duck first aid case (7) is attached to the pistol belt by means of an attaching clip located on the back. The case is closed by means of a flap which is secured by a glove-type fastener.
- Principle of use. The first aid case is used to carry either a field dressing or an unmounted magnetic compass.
- Sleeping bag carrier.
- Description. The sleeping bag carrier (8) is of olive drab cotton webbing. Two securing straps, with buckles, are provided to attach the sleeping bag to the carrier. Two attaching straps, with "lift-the-dot" fasteners, and two tie down straps, with glove-type fasteners, are provided for attaching the carrier to the suspenders. The carrier also has a handle so that it can be carried by hand.
- Principle of use. The sleeping bag carrier is designed so that the sleeping bag and other sleeping equipment can be carried on the back above the field pack. By means of a quick-release system, sleeping equipment can be dropped quickly in case of emergency.
- Pack adapter strap.
- Description. The olive drab cotton webbing pack adapter strap (9) is an item of organizational equipment compatible only with the individual load carrying equipment. It consists of two narrow, 321^-inch long straps joined at one end of a wide, T^-inch long web band, designed to accommodate the field pack. A bar buckle and a snap hook are attached to each strap.
- Principle of use. The pack adapter strap
permits the field pack to be attached to the
suspenders at 'a position high enough on
the individual's back to provide lower
space for carrying additional items
of equipment, such as canteens and first aid
kits, on the pistol belt. The adapter strap
also allows the field pack to be carried
high enough on the back to permit the
carry of heavy loads, such as mortar base
plates, ammunition, or radios.
- Pistol belt.
- Fighting and Existence Loads Concept. The
important point of the fighting and existence loads
concept is that the soldier should carry only the items
necessary to -accomplish his immediate mission. The
load the soldier carries should not include any other
item that can be provided by an effective and responsive supply system.
Because the type of mission, terrain, and environmental conditions will
influence clothing and equipment requirements, the unit commander may prescribe
the essential items. The prime purpose of the fighting and existence loads
concept is to lighten the soldier's load.
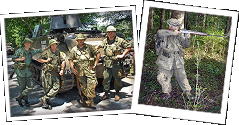
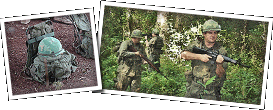
- Fighting load. The fighting load (figs. 15 and 16) consists of essential items of individual clothing, equipment, weapons, and ammunition which are carried by the foot soldier to accomplish the immediate mission of his unit. See appendix III for a list of typical items included in the fighting load.
- Existence load. The existence load consists
of items other than those in the fighting load
which are required to sustain or protect the
soldier, which may 'be necessary for increased
personal and environmental protection, and
which are not normally carried by the individual. When possible, the
existence load items are transported by means other than
man-carry. See appendix III for a list of
typical items included in the existence load.


- Assembly. The method for assembling the individual load-carrying
equipment is described below. A different procedure must be followed when
the equipment is assembled by parachutists in preparation for a jump. The
parachutists procedure is described in TM 57-220.
- Adjust pistol belt. Refer to figure 17 and
proceed as follows:
- Unfasten hook on each end of belt from the center eyelet in which it is engaged and shorten or lengthen 'belt so that it fits around the waist just loose enough so as not to constrict the clothing.
- Fasten hook for each end of belt into nearest center eyelet.
- Move a sliding keeper into position close to each hook to prevent the hook from unfastening.
- Move a sliding keeper into position close
to the male and female belt fasteners.

- Attach field pack to pistol belt. Refer to
figure 18 and proceed as follows:
- Lay the pack out flat with the back facing up, flap to the top, and the two attaching clips in an open position.
- Lay the belt out flat with the back facing up and the male belt fastener to your left.
- Locate the center of the belt and then insert the belt into the two open attaching clips of the pack so that the center of the belt matches the center of the pack.
- Close the two attaching clips of the pack,
making sure that the tip of the sliding bar
engages the hole in the bottom of the clip.
Note. To avoid losing equipment, fasten all attaching clips properly.

- Attach suspenders to field pack and pistol
belt. Refer to figures 19 and 20 and proceed
as follows:
- Lay the suspenders out flat, above the pack, with the inside facing up and the back suspender straps to the bottom.
- Attach back suspender straps to the pack by engaging the hooks of these two straps into the eyelets of the two webbed tabs of the pack. Insert the hooks into the eyelets with the open part of each hook facing the back of the pack.
- Attach the front suspender straps to the belt by first fastening buckles of the pistol belt.
- Fold the suspenders back on the pack so that they lay with the outside of the suspenders facing up.
- Take the left front suspender strap and engage its hook into the top eyelet on the front of the belt, nearest the female buckle.
- Take the right front suspender strap and engage its hook into the top eyelet on the front of the belt, nearest the male buckle.
- Insert hooks into the eyelets so that the
open part of each hook is to the front of
the belt and the loops are located to the
side away from the belt fasteners.
Note. To prevent the pistol belt from "riding up" in front when the ammunition pouches are empty or partially filled, engage the front suspender strap hooks in a top eyelet of the pistol belt at the side under the arms.


- Adjust front suspender straps. Refer to
figure 21 and proceed as follows:
- Unfasten belt, put on assembled equipment, and fasten belt.
- Unfasten the buckles on the two front suspender straps.
- Center the shoulder pads of the suspenders on the shoulders, and adjust length of each front suspender strap so that the belt is properly located at the waist.
- Fasten buckles to hold adjustment.
Press each buckle firmly with the thumb
to insure that it is fully closed.

- Adjust back suspender straps. Refer to
figure 22 and proceed as follows:
- Remove assembled equipment and place with inner side of pack facing up.
- Fasten pistol belt.
- Unfasten the buckles on the two back suspender straps.
- Locate center of each shoulder pad of suspenders.
- Fold shoulder pads over at center.
- Adjust length of each back suspender strap so that the belt hangs evenly front and back.
- Fasten buckles to hold adjustment.
Make certain buckles are properly fastened by pulling slightly
on the suspenders.

- Attach intrenchmg tool carrier to pistol
belt. Attach the carrier to the belt on
the left side by means of the two attaching
clips on the back of the carrier (fig. 23).
Do not attempt to insert the clips over two
thicknesses of the pistol belt webbing. The
carrier should be positioned so that when the
intrenching tool is placed in the carrier, the
handle of the tool will lie parallel to and
along the side of the wearer's thigh and will
not hinder the wearer's movement.

- Attach canteen cover to pistol belt. Attach
the cover to the belt on the right side, next
to the pack, by means of the two attaching
clips on the back of the cover (fig. 23). Do
not attempt to insert the clips over two
thicknesses of the pistol belt webbing.
Note. While the preferred position for the canteen cover is on the belt as described, the cover may be attached to the right side of the field pack. - Attach ammunition pouches to pistol belt.
Refer to figure 24 and proceed as follows:
- Attach a pouch to the belt on the left side, next to the intrenching tool carrier by means of the two attaching clips on the back of the pouch. Do not attempt to insert these clips over two thicknesses on the pistol belt webbing because the clips are designed to accommodate only one thickness of webbing.
- Unfasten the buckle of supporting strap of the pouch.
- Attach the snap of the supporting strap of the pouch to the metal loop located at the bottom edge of the shoulder pad. Make sure there is no twist in the strap.
- Adjust length of supporting strap so that it has the same amount of strain as the front suspender strap next to it.
- Fasten buckle on supporting strap to hold adjustment.
- Attach another pouch to the belt on the
right side, next to the canteen cover, using
same procedure as described above.
Note. When carrying a pistol, the pistol holster ia attached to the belt in lieu of the ammunition pouch attached to the right side of the belt.

- Attach first aid case. Attach the case for
the first aid packet or lensatic compass in
either of the following positions:
- To the belt in the front and on the right side next to the ammunition pouch (recommended position).
- To the left side of the right ammunition pouch.
- Attach sleeping bag carrier to sleeping bag.
- Roll the sleeping bag into as small and compact a roll as possible and tie with the sleeping bag footstraps.
- Lay the sleeping bag carrier out flat with the buckles of the two 1-inch wide securing straps away from you and the inside (side to which the handle is attached) facing up.
- Pick up the sleeping bag roll by the ends, with the foot end (where the bag ended when rolled) underneath and pointing toward you. Center the bag on the carrier straps with the foot end resting directly on the carrier handle (fig. 25).
- Pass the two securing straps of the carrier
around the bag, engage the buckles, and
pull the straps tight. Tuck the loose ends
of these two straps under.

- Attach sleeping bag and carrier to sleeping
bag and pistol belt. Refer to figure 26 and proceed
as follows :
- Unfasten the "lift-the-dot" snap fasteners on the two attaching straps of the carrier.
- Adjust the length of the two tiedown straps to within approximately two inches of their full length and unfasten the glove-type snap fasteners of these straps.
- Attach the two attaching straps of the carrier to the suspenders by passing each one through the web keeper on the top of the padded portion of the suspenders; then pass each strap through the metal loops located at the bottom edge of the front of the padded portion of the suspenders and back over the top of the web keeper; then fasten the "lift-the-dot" snap fastener of the attaching strap.
- Attach the two tiedown straps to the two front suspender straps by passing each one under the supporting straps of the ammunition pouches; then pass each strap through the metal loops of the hook on the front suspender strap, and fasten the glove-type snap fastener.
- After the assembled load has been put on,
adjust the length of the tiedown straps
so that the sleeping bag is held firmly in
position.
Note. The sleeping bag carrier and sleeping bag can be dropped quickly by first releasing the two carrier tiedown straps and then releasing the two carrier attaching straps.

- Attach bayonet or bayonet knife scabbard.
- Fasten the double hook on the back of the scabbard into the two eyelets of the web hanger located on the front of the intrenching tool carrier.
- Pass the strap, located on the front lower portion of the carrier, over the scabbard and close the glove-type snap fastener.
- Attach hand grenades.
- Attach hand grenade to the side of the ammunition pouch at the rearmost position so that grenade is well protected. Grenades should be carried in the front on the side of the ammunition pouch only when the carry of more than two grenades has been authorized.
- Slide safety level of hand grenade into loop of web attachment on rear of ammunition pouch.
- Pass web securing strap on side of ammunition pouch around tap of hand grenade, and fasten to glove-type snap fastener on back of loop.
- Attach pack adapter strap. The pack
adapter strap is attached as follows:
- Remove the field pack from the suspenders and pistol belt and lengthen the back suspender straps approximately four inches; then close the buckles tightly.
- Lay the suspenders out flat "with the outside facing up and the back suspender straps to the bottom.
- Place the pack adapter strap on top of the back suspender straps with the web band to the bottom and the snap hooks facing up.
- Pass each back suspender strap through the wide loops on the back of the pack adapter strap web band.
- Attach back suspender straps to the proper eyelets on the rear of the pistol belt.
- Attach the field pack to the pack adapter strap by inserting the attaching clips through the narrow loops on the front of the pack adapter strap web band.
- Attach the webbed tab eyelets of the field pack to the snap hooks of the pact adapter straps.
- Pass the ends of the pack adapter strap
narrow straps through the web keepers
on top of the padded portion of the suspenders, back over the top
of the web keepers, and through the buckles on the
strap.
Note. The pack adapter strap web band is not utilized when carrying heavy items of equipment such as mortar base plates, radios, etc. Attach the pack adapter strap for these loads by eliminating steps (d) and (f) above.
- Adjust pistol belt. Refer to figure 17 and
proceed as follows:
- Carry of Field Protective Mask. The recommended positions
for carrying the field protective mask with the load-carrying equipment
are as follows:
- The individual load-carrying equipment is designed so that it will balance with the pistol belt open. This design makes it possible to obtain ventilation by opening the pistol belt while on the march.
- Attaching clips, sliding keepers, hooks, and buckles must be kept free of dirt to insure proper operation of the equipment.
- The load-carrying equipment is not fire resistant. It can be quickly damaged by sparks from open fires or by drying the equipment too close to a hot stove. Take special care, therefore, to protect the equipment from sparks and to dry it slowly.